Script Components
Game object behavior is controlled by the components that are attached to them. Although the toolkit's built-in components can be very versatile, you will soon find you need to go beyond what they can provide to implement your own gameplay features. The toolkit allows you to create your own components using scripts. These allow you to trigger game events, modify component properties over time and respond to user input in any way you like. The toolkit requires two programming languages natively:
-
TypeScript, a language designed specifically for strong typed JavaScript development. Required for babylon toolkit development;
-
C# (pronounced C-sharp), an industry-standard language similar to Java or C++. Required for editor script components only;
In addition to these, many other .NET languages can be used with the Unity Editor to prepare your babylon scene content if they can compile a compatible DLL. Please refer to the Unity Plugin documentation for details.
Learning the art of programming and the use of these particular languages is beyond the scope of this introduction. However, there are many books, tutorials and other resources for learning how to use and program Unity Editor inspector windows.
Babylon Script Classes
Babylon script classes are referred to as Backing Classes. The backing class is the native runtime class that gets instantiated for the owned game object. The toolkit provides a set of script file templates for use in your project.
-
JavaScript File - Empty JavaScript code file. To be used as you see fit.
-
TypeScript Class - Generic TypeScript class file. To be used as you see fit.
-
Scene Controller - Script component designed to be used as the Main Scene controller class.
-
Mesh Component - A standard mesh component script to be used by all non Light and Camera game objects.
-
Light Component - A standard light component script to be used on Light game objects only.
-
Camera Component - A standard camera component script to used on Camera game objects only.
-
Shader Controller - Script component designed to sub class and control Shader Material properties.
-
Global Startup Script - Inline Global Application code and startup event functions.
Unity does not support normal html javascript (.js) files. So rename any plain (.js) file extensions to (.bjs) to be included in your game project output.
Creating Backing Classes
Unlike most other assets, scripts are usually created within Unity directly. You can create a new backing class script from the Create menu at the top left of the Project panel or by selecting Assets > Create > Babylon > Babylon TypeScript and select the desired backing class script asset type from the main menu.
The new backing class script will be created in whichever folder you have selected in the Project panel. The new backing class script file’s name will be selected, prompting you to enter a new name.
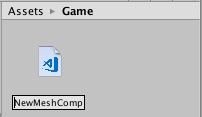
It is a good idea to enter the name of the new backing class script at this point rather than editing it later. You must rename the class initial text inside the file with your new script name.
Anatomy Of A Backing Class
When you double-click a script Asset in Unity, it will be opened in a text editor. By default, Unity will use the default code editor, but you can select any code editor you like from the External Tools panel in Unity’s preferences (go to Unity > Preferences).
Example mesh component contents of the file will look something like this:
module PROJECT {        export class NewMeshComponent extends BABYLON.MeshComponent {            public constructor(owner: BABYLON.AbstractMesh, scene: BABYLON.Scene, tick: boolean = true, propertyBag: any = {}) {                super(owner, scene, tick, propertyBag);            }
            protected start() :void {                // Start component function            }
            protected update() :void {                // Update render loop function            }
            protected after() :void {                // After render loop function            }
            protected destroy() :void {                // Destroy component function            }        }    }
An editor script component makes its connection with the internal workings of the babylon toolkit scene manager by implementing a class which derives from the built-in class called EditorScriptComponent. You can think of a class as a kind of blueprint for creating a new component type that can be attached to game objects. Each time you attach a script component to a game object, it creates a new instance of the object defined by the blueprint. The name of the class is taken from the editor script component's Babylon Class property. The class names must be the same to enable the script component to be attached to a game object.
The main things to note, however, are the four functions defined inside the class. The Update function is the place to put code that will handle the frame update for the game object. This might include movement, triggering actions and responding to user input, basically anything that needs to be handled over time during gameplay. To enable the Update function to do its work, it is often useful to be able to set up variables, read preferences and make connections with other game objects before any game action takes place. The Start function will be called by the scene manager before gameplay begins (ie, before the Update function is called for the first time) and is an ideal place to do any initialization. The After function gets called after the update (including all other component update) functions. Then finally the Destroy function gets called on game object disposal.
Note to beginner game developers: You may not be aware that the use of any game play logic should not be handled in the constructor function. This is because the construction of objects is handled by the scene manager parser and does not take place at the start of gameplay as you might expect. If you include game loop type logic in a constructor for a script component, it will interfere with the normal operation of the managed life cycle and can cause major problems with the project. Use construction for internal property setup only.
Editor Script Components (C#)
Editor script components are the primary way of attaching native babylon classes to game objects and prefabs in the editor. They represent the design time interface to your game object. You can create a new design time editor script component from the Create menu at the top left of the Project panel or by selecting Assets > Create > Babylon > Editor Script Component (C#) from the main menu.
The main purpose of the editor script component is to assign the native babylon backing class name in the component constructor and to provide desgin time component properties to the native backing class:
Example runtime backing class script file:
module PROJECT {        export class TestMeshComponent extends BABYLON.MeshComponent {
            protected start() :void {                // Start hello world example                console.log(this.getProperty<string>("hello"));            }        }    }
Example design time editor script component file:
/* Babylon Editor Script Component (C# UnityScript) */
    using System;    using UnityEditor;    using UnityEngine;    using Unity3D2Babylon;
    namespace MyProject    {        public class TestScriptComponent : EditorScriptComponent        {            [Header("-Script Properties-")]
            [BabylonProperty]            public string hello = "Hello World";
            protected TestScriptComponent()            {                this.babylonClass = "PROJECT.TestMeshComponent";            }        }    }
Custom Property Inspector Support
A key to increasing the speed of game creation is to create custom editors for commonly used components. When you create a script in Unity, by default it inherits from MonoBehaviour, and therefore is a Component which can be placed on a game object. When placed on a game object, the Inspector displays a default interface for viewing and editing all public variables that can be shown - such as integers, floats, strings, Vector3’s, etc.
The code in OnInspectorGUI is executed whenever Unity displays the editor in the Inspector. You can put any GUI code in here - it works just like OnGUI does for games, but is run inside the Inspector. Editor defines the target property that you can use to access the object being inspected. Please refer to the Unity Extending The Editor documentation for details.
Example custom property inspector editor script component file:
/* Babylon Editor Script Component (C# UnityScript) */
    using System;    using UnityEditor;    using UnityEngine;    using Unity3D2Babylon;
    namespace MyProject    {        [Serializable]        public class Person        {            public string first;            public string last;        }
        public class NewScriptComponent : EditorScriptComponent        {            [Header("-Script Properties-")]
            [BabylonProperty]            public string hello = "Hello World";
            protected NewScriptComponent()            {                this.babylonClass = "BABYLON.SceneComponent";                this.OnExportProperties = this.OnExportPropertiesHandler;            }
            public void OnExportPropertiesHandler(SceneBuilder sceneBuilder, GameObject unityGameObject, Dictionary<string, object> propertyBag)            {                // Add Custom Property Bag Item                propertyBag.Add("person", new Person { first = "Mackey", last = "Kinard" });            }        }
        [CustomEditor(typeof(NewScriptComponent)), CanEditMultipleObjects]        public class NewScriptComponentEditor : Editor        {            public override void OnInspectorGUI()            {                // Draw Custom Inspector Properties                DrawDefaultInspector();                NewScriptComponent script = (NewScriptComponent)target;            }        }    }
Managed System Components
The toolkit provides a base set of babylon toolkit managed framework script components for easy use in your projects.
Default Scene Controller
The primary component to serve as the main entry point and controller class for the scene is the Default Scene Controller. The default scene controller component should be attached to an empty game object.
It is a good idea to attach all scene level script components (not required on a specific game object, like sound) to a main game object. You can attach the built-in default scene controller script component by selecting Components > Babylon > System Components > Default Scene Controller from the main menu.
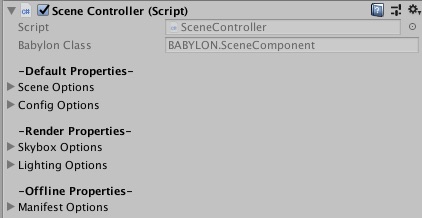
The attached default scene controller provided many properties to simplfy scene configuration and the amount of required code (if any) to load and manage the life cycle of your scene.
Core System Components
The toolkit provides serveral built-in core script components. You can attach any of the toolkit's script components by selecting Components > Babylon > System Components from the main menu and choosing the desired component name.
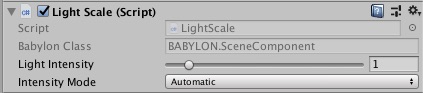
Light Scale
The light component is for a Light only. It scales the brightness and sets the mode of the light. The Intensity of a light is multiplied with the Light color. The value can be between 0 and 10. This allows you to create over bright lights.
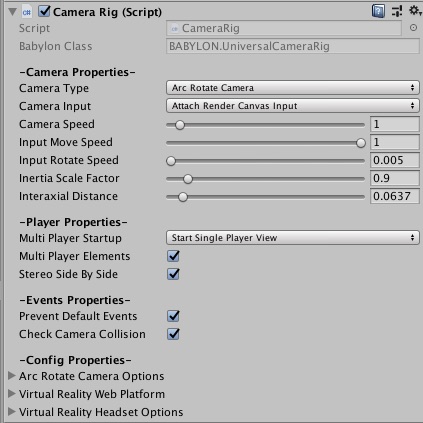
Camera Rig
The camera rig component is for a Camera only. The rig enables custom render features. Cameras are the devices that capture and display the world to the player. By customizing and manipulating cameras, you can make the presentation of your game truly unique. You can have an unlimited number of cameras in a scene. They can be set to render in any order, at any place on the screen, or only certain parts of the screen.
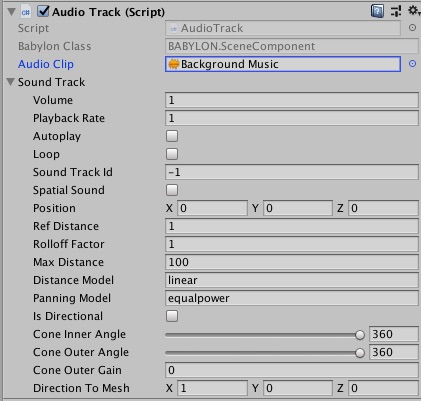
Audio Track
The audio track components plays back an audio clip in the scene. The sound engine offers ambient sound, spatialized sound and directional sound. It can be created by code or by loading a .babylon file. It follows the simple & powerful philosophy of the rest of the engine as you’re going to see. The sound format supported is the one from the browser. It’s usually at least .mp3 and .wav.
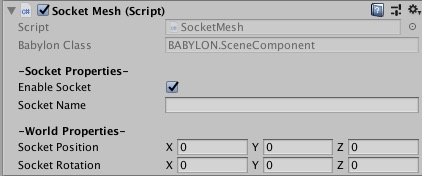
Socket Mesh
The socket mesh component attaches an empty mesh to a character. Commonly in games, you will want to attach an object to the bone of a character. This might be a weapon attached to a hand, or a hat attached to the head. For this purpose, the toolkit allows you to create Sockets which are attached to a bone of a skeleton. Socket meshes can then be translated, rotated, and scaled relative to the bone. Static Meshes and/or Skeletal Meshes can also be attached to sockets.
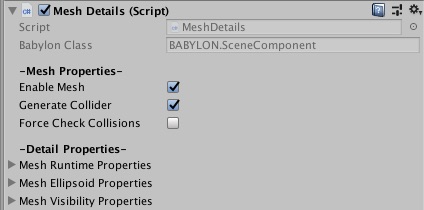
Mesh Details
The mesh details component enables several Runtime rendering properties to be set on a game object during the design phase. This is very useful for overriding visibilty and collision details for the specified mesh game object.
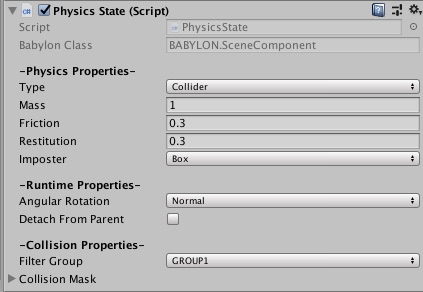
Physics State
The physics state component activates runtime physical simualation for game objects. To have convincing physical behaviour, an object in a game must accelerate correctly and be affected by collisions, gravity and other forces. The built-in physics engines provide components that handle the physical simulation for you. With just a few parameter settings, you can create objects that behave passively in a realistic way (ie, they will be moved by collisions and falls but will not start moving by themselves). By controlling the physics from scripts, you can give an object the dynamics of a vehicle, a machine, or even a piece of fabric.
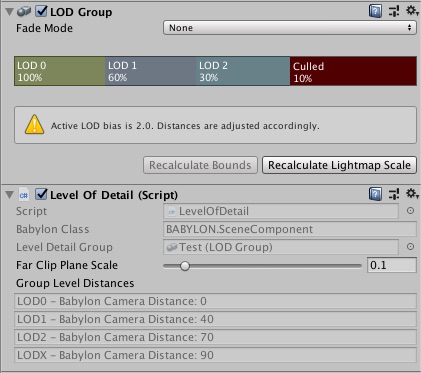
Level Of Detail
The level of detail component can help improve overall game performance. When a game object in the scene is a long way from the camera, the amount of detail that can be seen on it is greatly reduced. However, the same number of triangles will be used to render the object, even though the detail will not be noticed. An optimisation technique called Level Of Detail (LOD) rendering allows you to reduce the number of triangles rendered for an object as its distance from the camera increases. As long as your objects aren’t all close to the camera at the same time, LOD will reduce the load on the hardware and improve rendering performance. The toolkit also requires the LOD Group component to set up LOD rendering for a object.
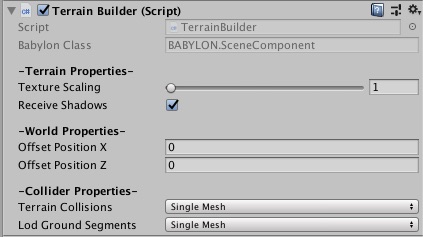
Terrain Builder
The terrain builder component is for a Terrain only. The builder allows you to add vast landscapes to your games. At runtime, terrain rendering is highly optimized for rendering efficiency while in the editor, a selection of tools is available to make terrains easy and quick to create. The toolkit also requires the Terrain component set setup terrain landscapes for your game project.
Animation State
The animation state component supports frame by frame skeletal animation posing. Animation states are the basic building blocks of an Animation State Machine. Each state contains an individual animation sequence (or blend tree) which will play while the character is in that state. When an event in the game triggers a state transition, the character will be left in a new state whose animation sequence will then take over.

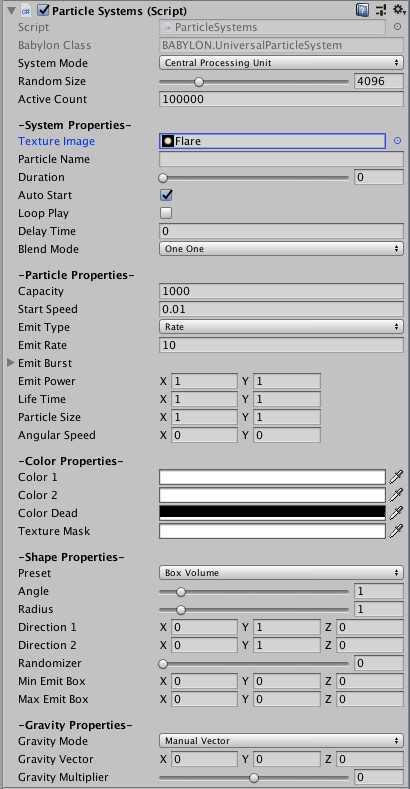
Particle Systems
The particle system component provides. In a 3D game, most characters, props and scenery elements are represented as meshes. Meshes and sprites are the ideal way to depict “solid” objects with a well-defined shape. There are other entities in games, however, that are fluid and intangible in nature and consequently difficult to portray using meshes or sprites. For effects like moving liquids, smoke, clouds, flames and magic spells, a different approach to graphics known as particle systems can be used to capture the inherent fluidity and energy.
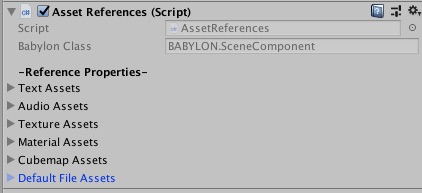
Asset References
The asset references component attaches project files to the current scene for exportation. This is useful for exporting scene content that is not already associated with a script component or a shader material.
Component Tags
The component tags support additional object tags. A Tag is a reference word which you can assign to one or more game bbjects. For example, you might define “Player” Tags for player-controlled characters and an “Enemy” Tag for non-player-controlled characters. You might define items the player can collect in a Scene with a “Collectable” Tag.
Tags help you identify game objects for scripting purposes. They ensure you don’t need to manually add game objects to a script’s exposed properties using drag and drop, thereby saving time when you are using the same script code in multiple game objects. Tags are useful for triggers in Collider control scripts; they need to work out whether the player is interacting with an enemy, a prop, or a collectable, for example.

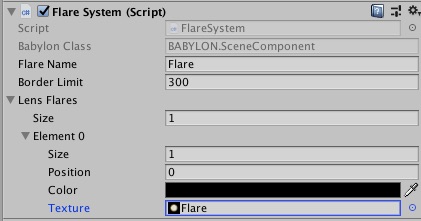
Lens Flare Systems
The lens flare systems component simulate the effect of lights refracting inside camera lens. They are used to represent really bright lights or, more subtly, just to add a bit more atmosphere to your scene.
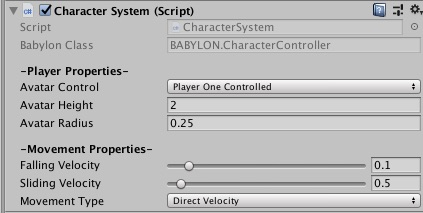
Character Controller
The character controller component controls game object movement. The character in a first or third person game will often need some collision based physics so that it doesn’t fall through the floor or walk through walls. Usually, though, the character’s acceleration and movement will not be physically realistic, so it may be able to accelerate, brake and change direction almost instantly without being affected by momentum.
A character controller cannot walk through static colliders in a scene, and so will follow floors and be obstructed by walls. It can push physics body objects aside while moving but will not be accelerated by incoming collisions. This means that you can use the standard 3D colliders to create a scene around which the controller will walk but you are not limited by realistic physical behaviour on the character itself.
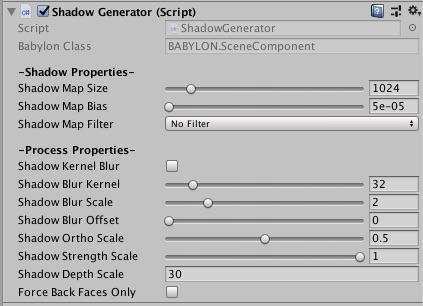
Shadow Map Generator
The shadow map generator component is for a Light only. The generator enables dynamically generated shadows depending upon a light. This is the main object responsible of generating shadows in the framework.